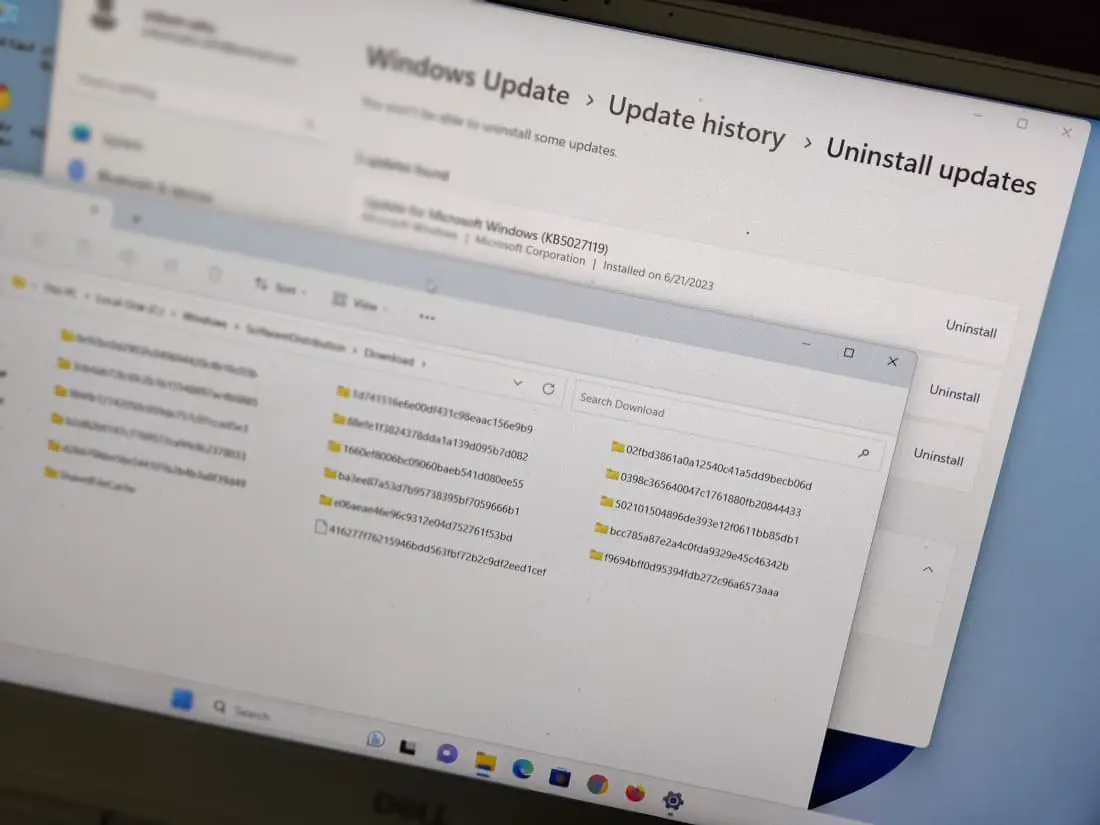
Install Windows 11 updates are essential to keep your operating system secure, stable, and up to date. Microsoft regularly releases Windows updates that include important security patches, bug fixes, and new features that enhance the overall performance of your Windows 11 system. However, at times, Windows Updates can fail for a variety of reasons or Pending Windows Updates which refuse to install for some reason. From low disk space to driver conflicts, Corrupt System Files are common reason behind Windows update failure. This article explores How to Remove failed updates from Windows 11, By doing so, you can then restart your computer and attempt the installation process again to ensure a fresh and successful update.
Contents
Remove pending updates on Windows 11
To delete pending updates on Windows 11, you can simply delete the files within the “Download” folder located in the “SoftwareDistribution” directory. This folder holds the necessary files used by Windows Update to apply system updates.
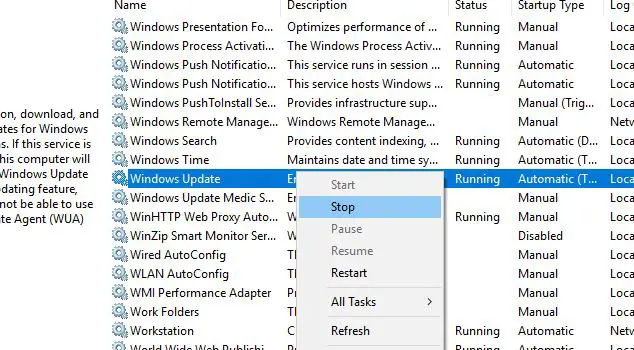
Step 01: To delete pending Windows updates first, you need to stop the Windows update service.
- Press the Windows key + R, type services.msc and click ok
- Scroll down to locate Windows update service, right-click on it select stop,
Step 02: Next, you need To Delete Old Data Windows Updates Data
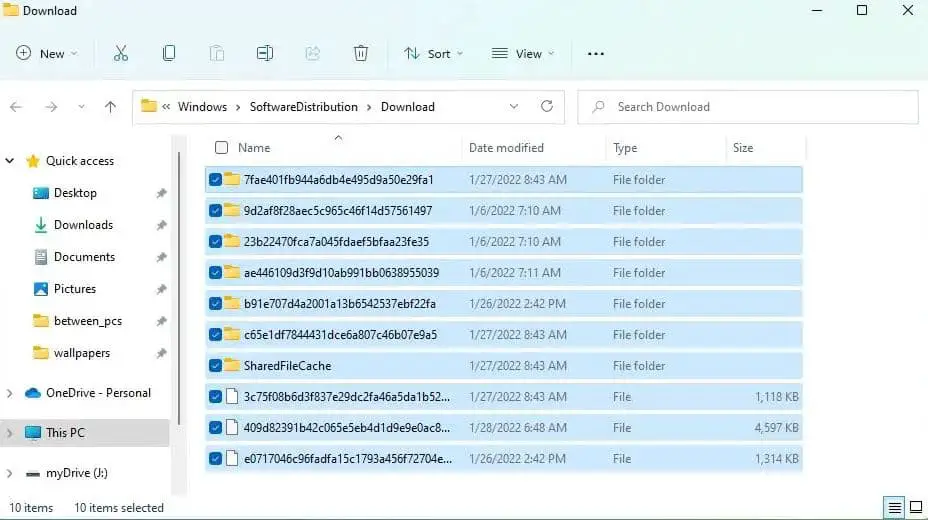
- Press Windows key + E to Open File Explorer on Windows 11.
- Now navigate the following path C:\Windows\SoftwareDistribution\Download
- Select all the folders and files inside the “Download” folder. (Ctrl + A to “Select all”)
- And finally, Click the Delete button or hit the Del key on the keyboard to delete pending updates on Windows 11.
Step 03: open Windows service and restart the Windows update service again. Now check for and try to install Windows 11 updates again.
Uninstall windows 11 updates
If recent Windows updates crash your computer or cause other problems. You can uninstall Windows updates from Windows update history.
Method 01: From windows update history
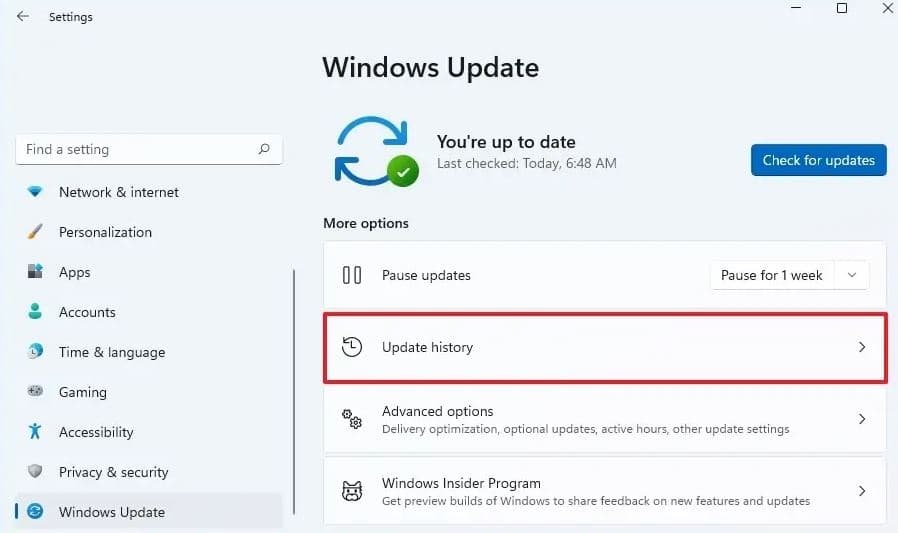
- Press Windows key + I to open the settings app
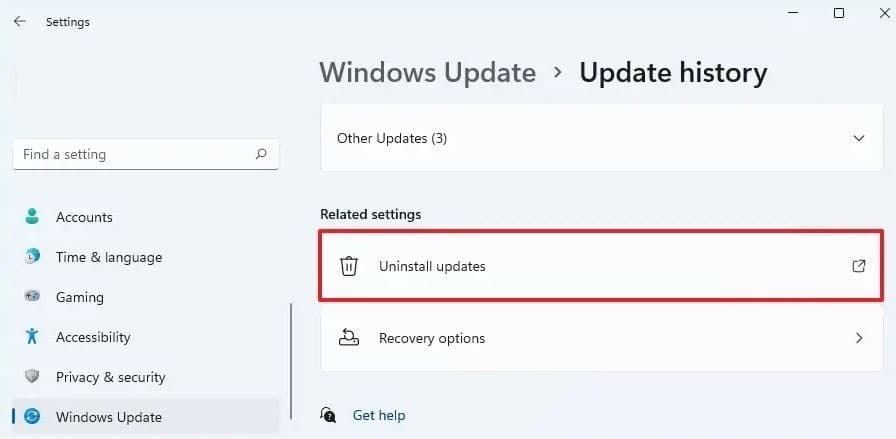
- Go to windows update then Update History,
- Under the “Related settings” section, click the Uninstall updates setting.
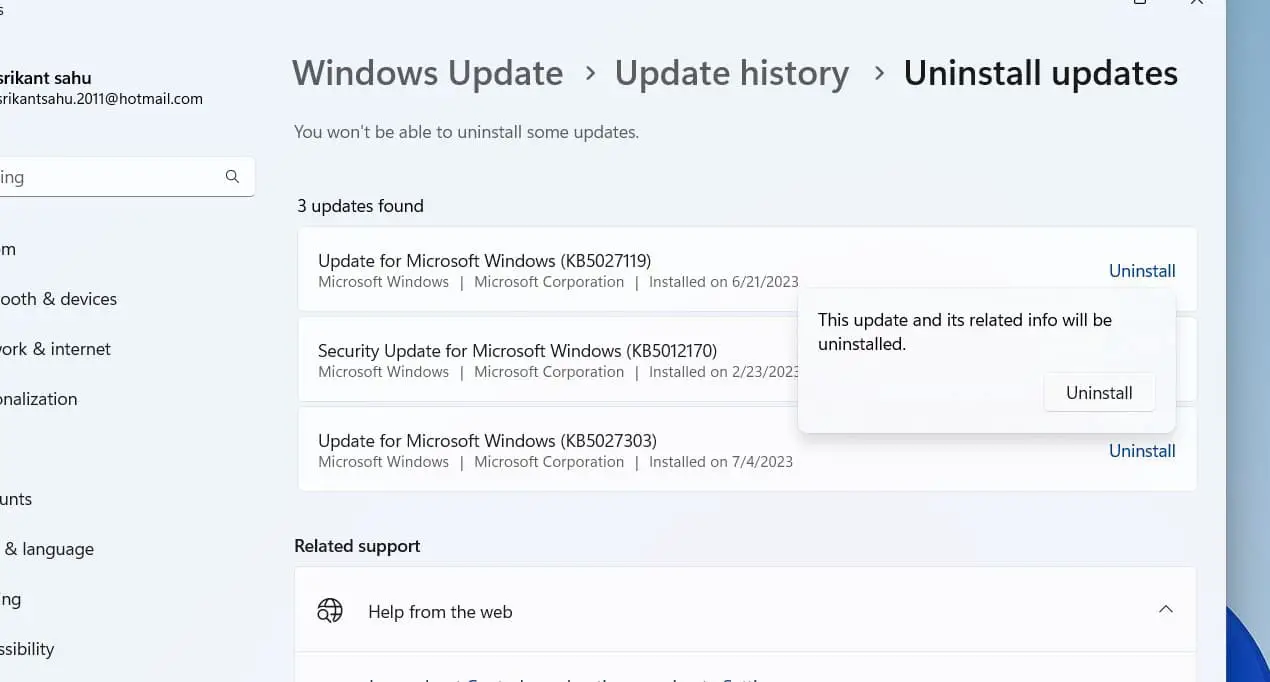
- Locate the recently installed update, and Click the Uninstall option to remove the update from Windows 11.
Method 02: Using Command prompt
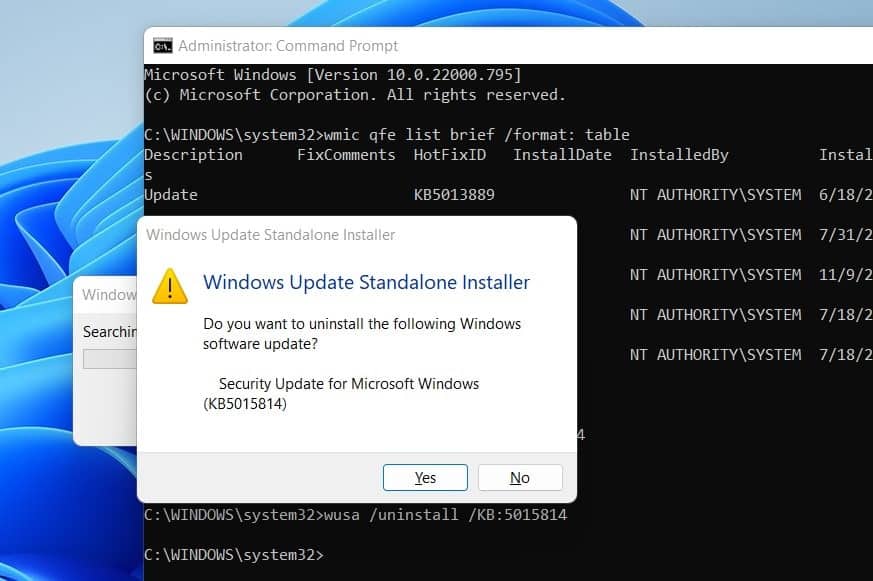
In addition, you can open the command prompt as administrator and run the following command to uninstall Windows 11 updates.
wusa /uninstall /kb:5015814
Note- Replace KBNUMBER with the KB number corresponding to the update you are trying to uninstall.
Method 03:
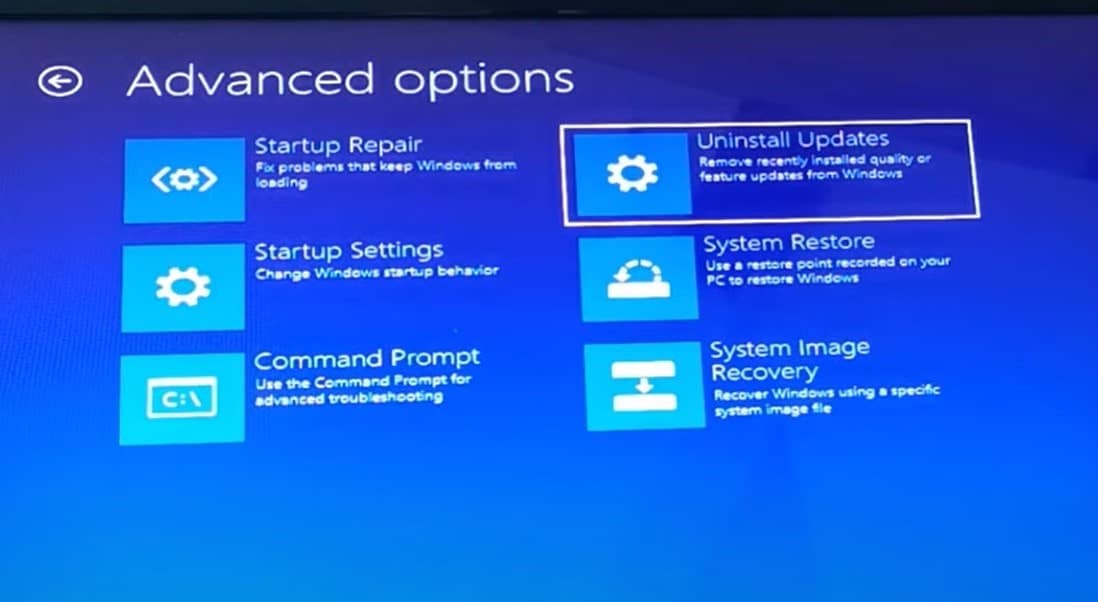
Again if Windows 11 won’t boot after the Windows update, you can uninstall the Windows update from the Advanced options.
Run the Windows Update Troubleshoot Tool
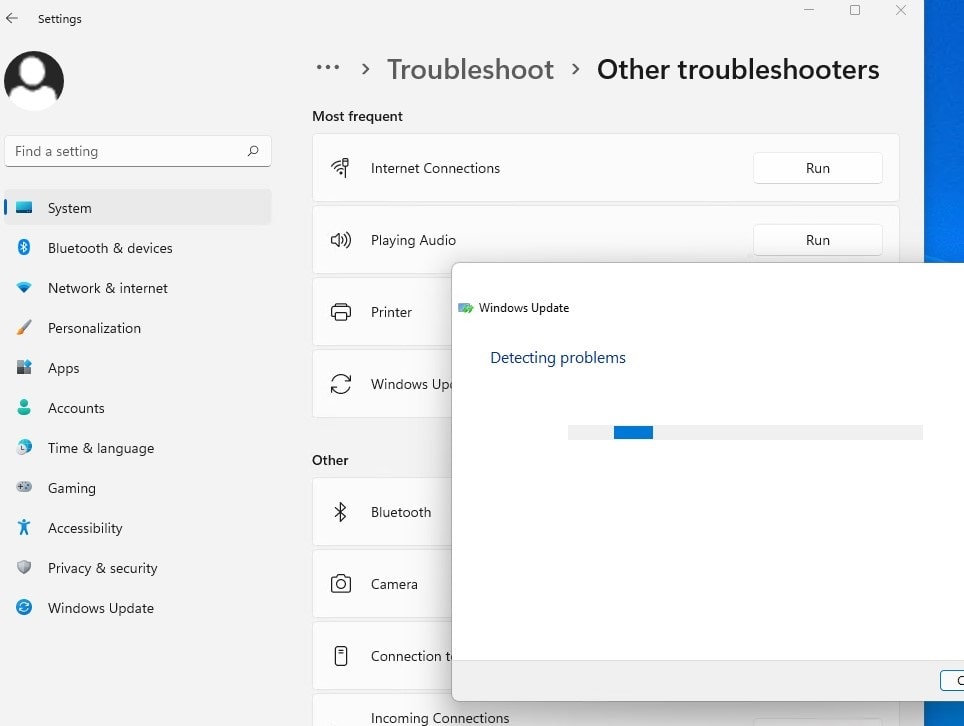
In addition you can run the built-in tool Windows Update Troubleshooter that help automatically detect and fix common problems that may prevent Windows Updates from installing or functioning correctly.
- Press windows key + X and select settings
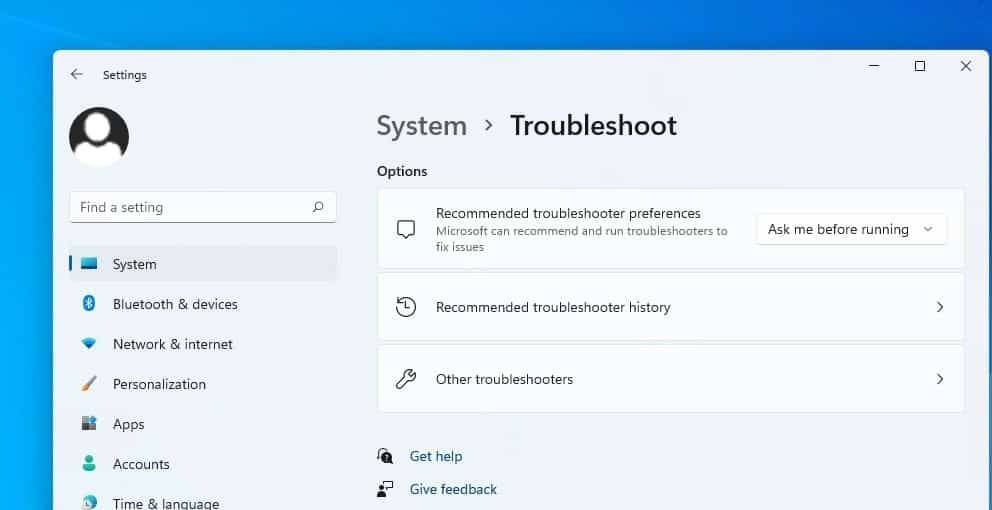
- Go to system then troubleshoot and click on Othertroubleshooters
- Click Run next to Windows update and follow on screen instructions.
The troubleshooter, ensures that the necessary services responsible for Windows Updates are running, It repairs or resets the Windows Update database, or resets Windows Update configuration to its default state, which can resolve conflicts or incorrect settings.
Run system flie checker (SFC) and DISM command
If the system files responsible for Windows Updates are corrupted, it can lead to issues Windows Updates to get stuck or fail to install correctly. Run system file checker and DISM scan to repair system files and improve the overall health of your Windows system, which can help resolve issues with Windows Updates.
- Press windows key + S, type cmd and click on Run as administrator,
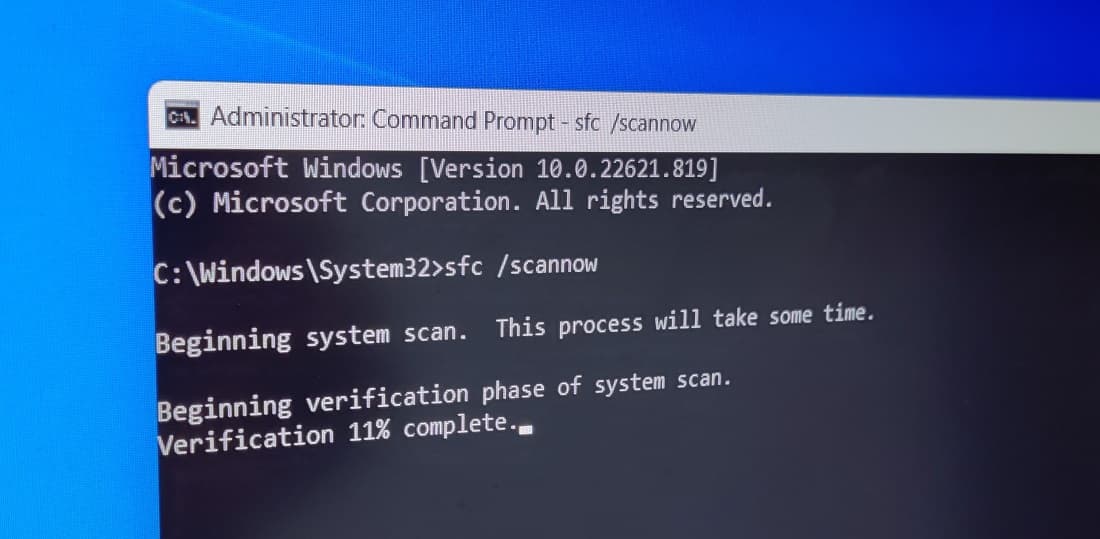
- Now run command “sfc /scannow“. This will scan your system for corrupted system files and attempt to repair them automatically.
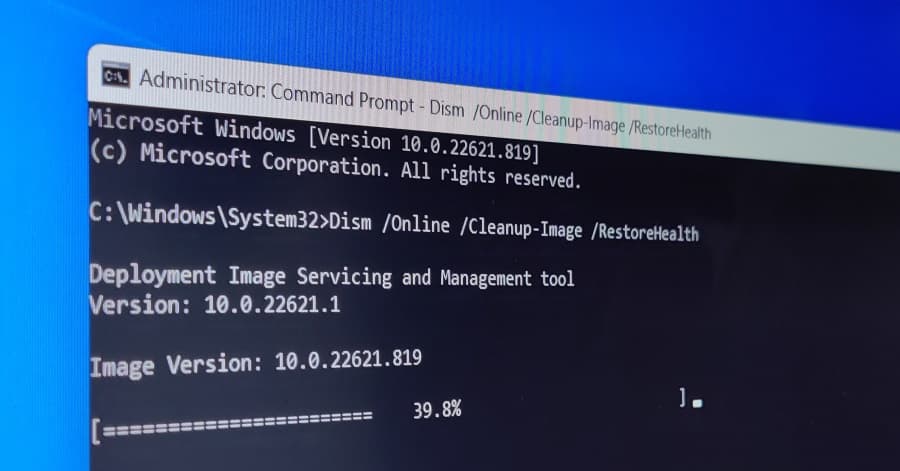
- Next run DISM command “DISM /online /cleanup-image /restorehealth” to checks for corrupted system files in the Windows image and restores them if necessary.
- After running SFC and DISM, it’s recommended to restart your computer to ensure that any repaired system files take effect.
Download and install Windows updates manually
Still experiencing issues with automatic Windows updates. Manually downloading and installing Windows updates allows you to have more control over the update process and get rid of such error.
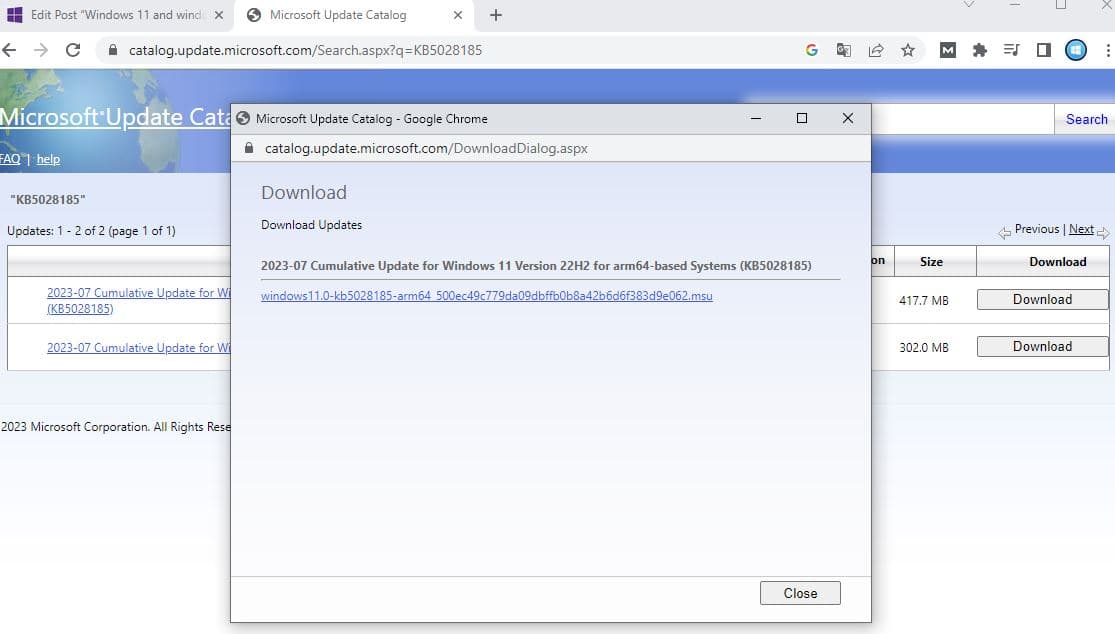
- Open a web browser and go to the Windows Update Catalog website (https://www.catalog.update.microsoft.com/Home.aspx).
- Now search for specific updates by entering the KB number or a relevant keyword in the search bar. for example, KB4481031
- Select the correct version and click Download, Click on the link and Windows will update your computer
Now locate the downloaded file and double-click on it to run the installer and Follow the on-screen instructions to install the update.
In addition if windows update stuck download, of fails to install:
- Ensure internet connection is stable and working properly.
- Make sure that your system has enough free disk space to download and install updates.
- Turn off antivirus temporarily and try installing windows updates.
Also open windows services and Verify that the Windows Update service is running and set to automatic.
Also read:
- How to fix windows update problems in windows 10
- Windows 11 computer black screen on startup [Solved]
- How to find wifi password on windows 10 /11 Laptop
- Windows 11 sound not working after update? 8 solutions to apply
- 9 Most Common Windows 11 Problems [Solved]
- Windows 11 settings you should change now for better user experience

