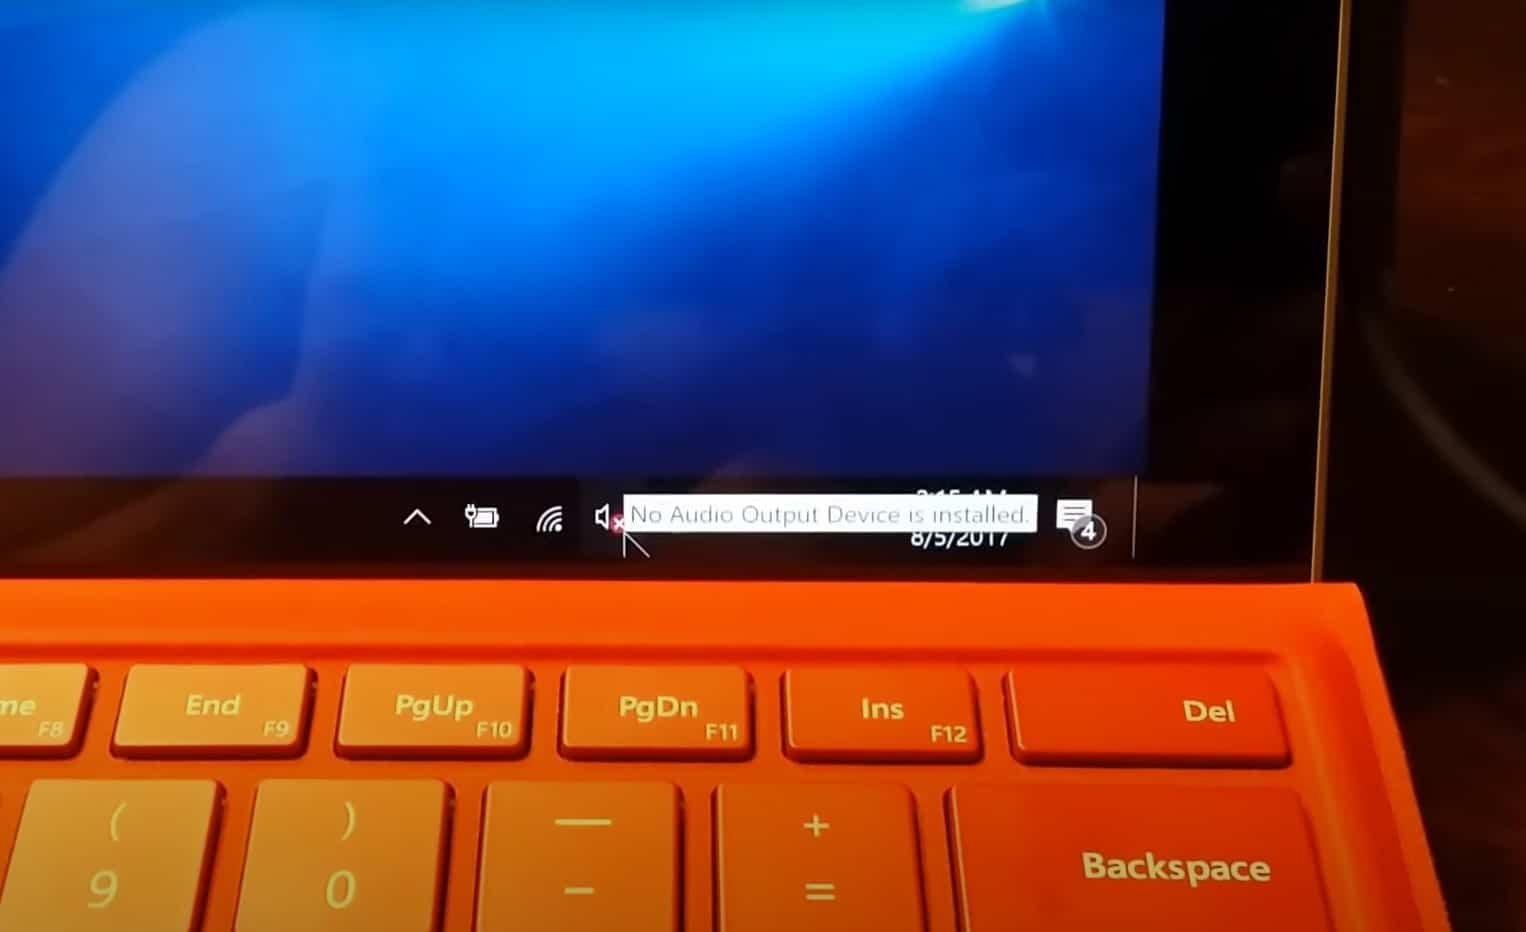
The “No Audio Output Device Is Installed” error indicates Windows failed to detect or communicate with your system’s audio device. This can prevent all sound-related functionalities, including music playback, system notifications, and audio during video calls. Outdated or corrupted audio drivers to Hardware malfunction (e.g., disconnected or damaged audio device) are some of the common reasons behind this. Here are few troubleshooting steps help you fix No Audio Output Device installed error on Windows 11 or 10.
Contents
How To Fix No Audio Output Device Is Installed error
This issue can be a temporary glitch, a driver-related issue, or, in some cases, caused by system file corruption.
- Driver Issues: Outdated, missing, or corrupted audio drivers are the primary reason for this error.
- Disabled Audio Device: The audio output device may be disabled in system settings.
- Windows Update Conflicts: Recent Windows updates may have caused compatibility issues with audio drivers.
- Hardware Malfunction: A faulty sound card or disconnected internal components can lead to the issue.
- Corrupted System Files: Damage to essential system files can interfere with audio output functionality.
Let’s first check and Ensure your speakers, headphones, or other audio equipment are properly connected. Also Verify you’re using the correct audio port (green for speakers/headphones, pink for microphones). In addition, test the device on another computer to rule out hardware failure.
- Click the speaker icon in the taskbar and ensure the volume is not muted.
- Use function keys (e.g., F2 or F3) to adjust volume or unmute the system.
Restart Windows Audio Services
Windows audio relies on specific background services to function. Restarting these services can often resolve the issue:
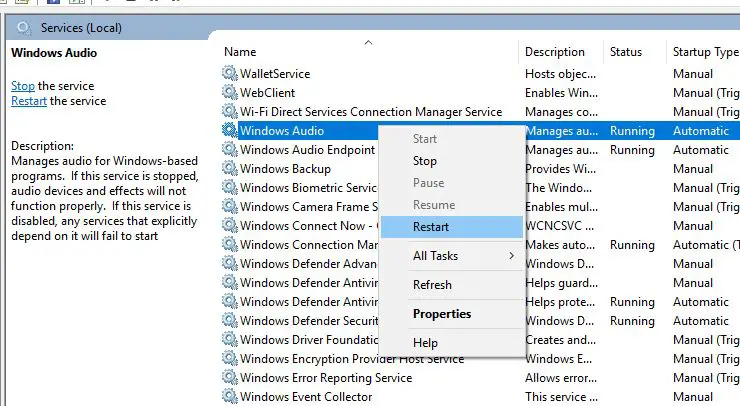
- Press Win + R, type services.msc, and press Enter.
- Locate the following services:
- Windows Audio
- Windows Audio Endpoint Builder
- Right-click each service and select Restart.
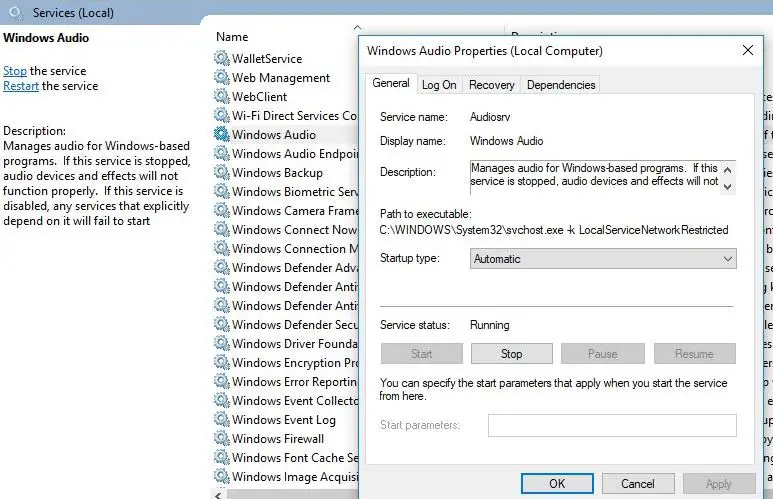
- Set their Startup Type to Automatic.
Note: If you find any of these services don’t have Running Status and their Startup Type is not set to Automatic, then double-click the service and set this in the service’s property sheet.
Check after performing these steps, is the audio started working or not. Also, check this post If you find the Microphone not working after install Windows 10.
Use The Windows Audio Troubleshooter
Run the Build in Audio sound Troubleshooter, and let Windows detect and fix the problem itself first.
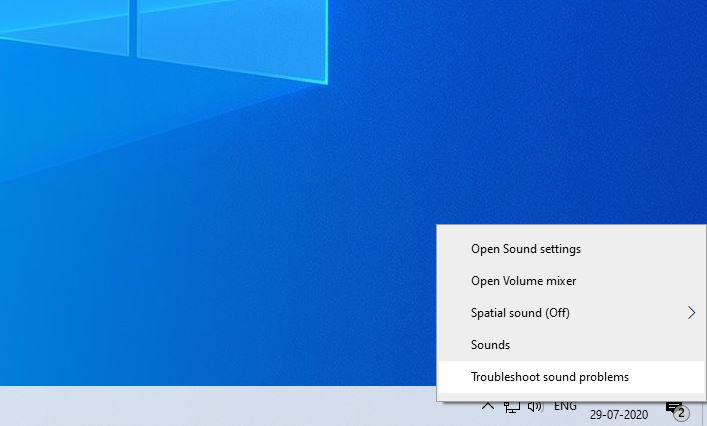
- Simply Right-click on the Speaker Icon, a pop-up will appear,
- Click Troubleshoot sound problems.
Also, you can Run the Audio troubleshooter from settings -> update & security -> troubleshooting -> click on playing audio and run the troubleshooter. Follow on Screen instructions To complete the troubleshooting process.
The audio troubleshooter will look for the issues and display the results once the search is completed. Play any audio file to check for sound. If there is sound your issue is resolved. Otherwise, click Explore additional options and proceed accordingly.
Enable audio output device Windows 10
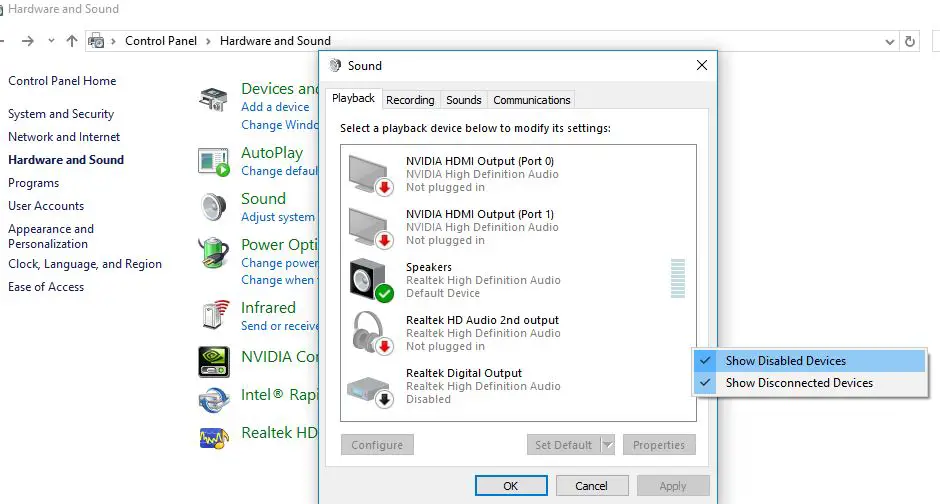
If the problem started after the recent Windows 10 upgrade there is a chance due to incompatibility issues or bed driver windows automatically Disable the audio device, then you might not see it under the list of playback devices.
- On the Start menu search Type sound and select it from the search results.
- Here Under the Playback tab, right-click on the empty area
- Make sure “Show Disabled Devices” has a checkmark on it.
- If headphones/Speakers are disabled, it will now show up in the list.
- Right-click on the device and Enable it
- Select “Set Default” Check if it helps.
Update, Reinstall, or Roll Back Audio Drivers
The audio driver is the software that allows Windows to communicate with your audio hardware. Issues with the driver are among the most common causes of this error.
- Press
Win + Xand select Device Manager. - Expand the Sound, video, and game controllers section.
- Right-click your audio device (e.g., Realtek, Intel Audio) and choose Update Driver.
- Select Search automatically for drivers and follow the prompts.
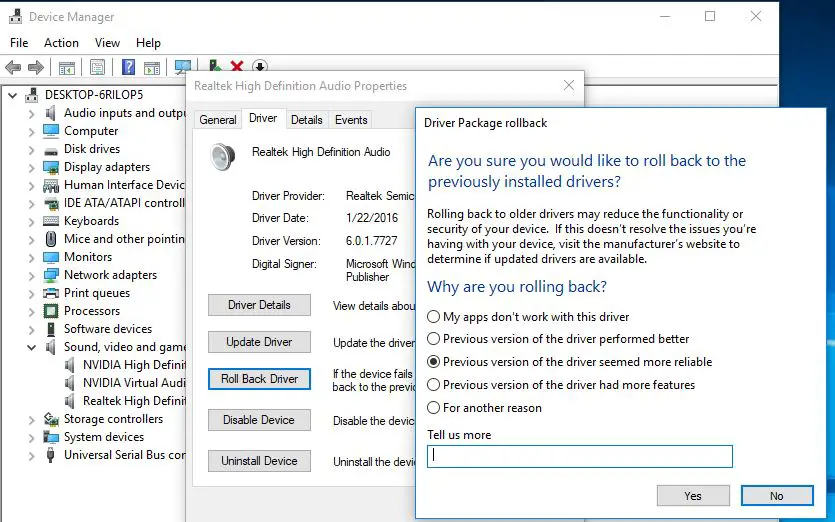
If the problem started after recent driver update, try Rolling Back the Driver
- Right-click the audio device in Device Manager and select Properties.
- Go to the Driver tab and click Roll Back Driver (if available).
Reinstall Audio Driver
- In Device Manager, right-click the audio device and select Uninstall Device.
- Check the box for Delete the driver software for this device if prompted.
- Restart your computer. Windows will attempt to reinstall the driver automatically.
Also, you can visit the device manufacturer’s site to download and install latest audio driver.
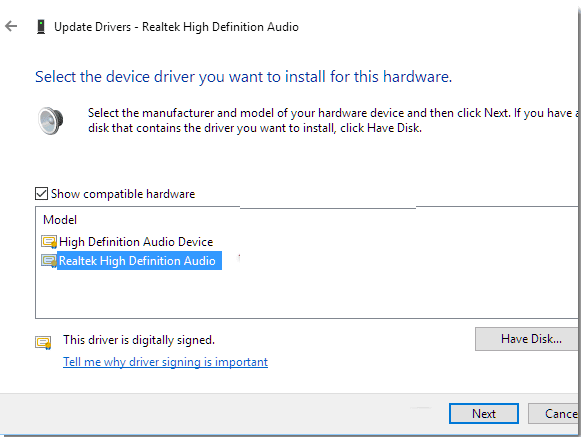
If that didn’t work, try using the generic audio driver that comes with Windows.
- Again open Device Manager,
- Expand Sound, video and game controllers.
- Right-click on the current installed audio driver and select update driver software.
- Browse my computer for driver software
- Let me pick from a list of device drivers on my computer.
- Select High Definition Audio Device, select Next and follow the instructions to install it.
Change Different Sound Card
If you still have a problem even after trying Windows reinstallation then it’s 100% a hardware fault. Try adding a new sound card to your system and check. This time Windows no audio sound problem gets solved.
To avoid encountering the “No Audio Output Device Is Installed” error in the future:
- Regularly update your audio drivers and Windows OS.
- Avoid using unverified third-party driver software.
- Backup your drivers using tools like DriverBackup! before making significant changes.
- Keep your PC free from malware with regular scans.
- Be cautious when installing updates; create restore points before significant changes.
Also read:

